
Tutorial: iPad and Procreate for Illustration
At the beginning of the year I hosted a live art session at the Apple Store on Regent Street as part of Today at Apple. I shared some of the techniques I use for creating work using Procreate for the iPad, met some fab people and had a great time! I was also blown away by the work created (scroll down for some of my favourites!)
A few people who couldn’t make the event messaged me to ask if it would be available online. I’ve discussed my process before on my blog here, but I’ve added a more in-depth tutorial below, with a step-by-step guide covering the techniques I use, from the initial sketch, to drawing shapes, and adding texture.
NB. I discussed my initial experience of using the iPad, Apple Pencil and Procreate in an earlier blog post here. As with any program there are hundreds of different techniques and ways of doing things. If you are new to the App I really recommend downloading the Procreate guide and following the App on Instagram, where they demonstrate different tools and techniques.
Scroll down for the step-by-step tutorial…
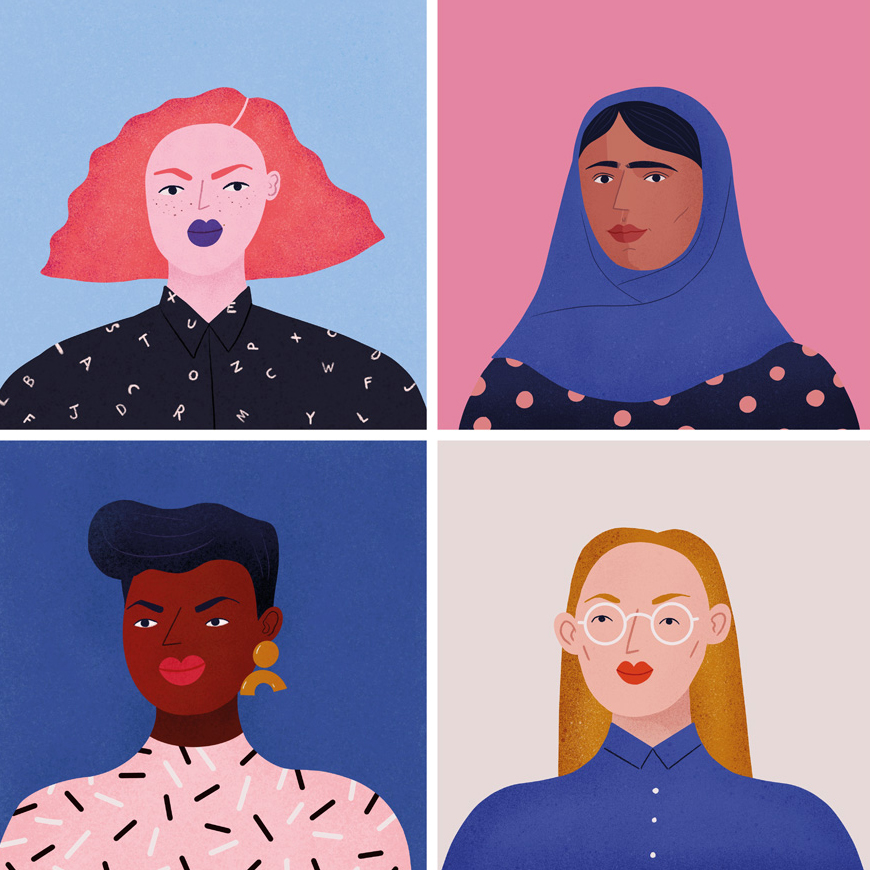
‘Gals’ - available as a print here
Step 1. Start with a Sketch
I begin every piece with a simple line sketch which will I use as a ‘guide’ as I build up the layers. I do this on a new layer and take the opacity down to around 30%.

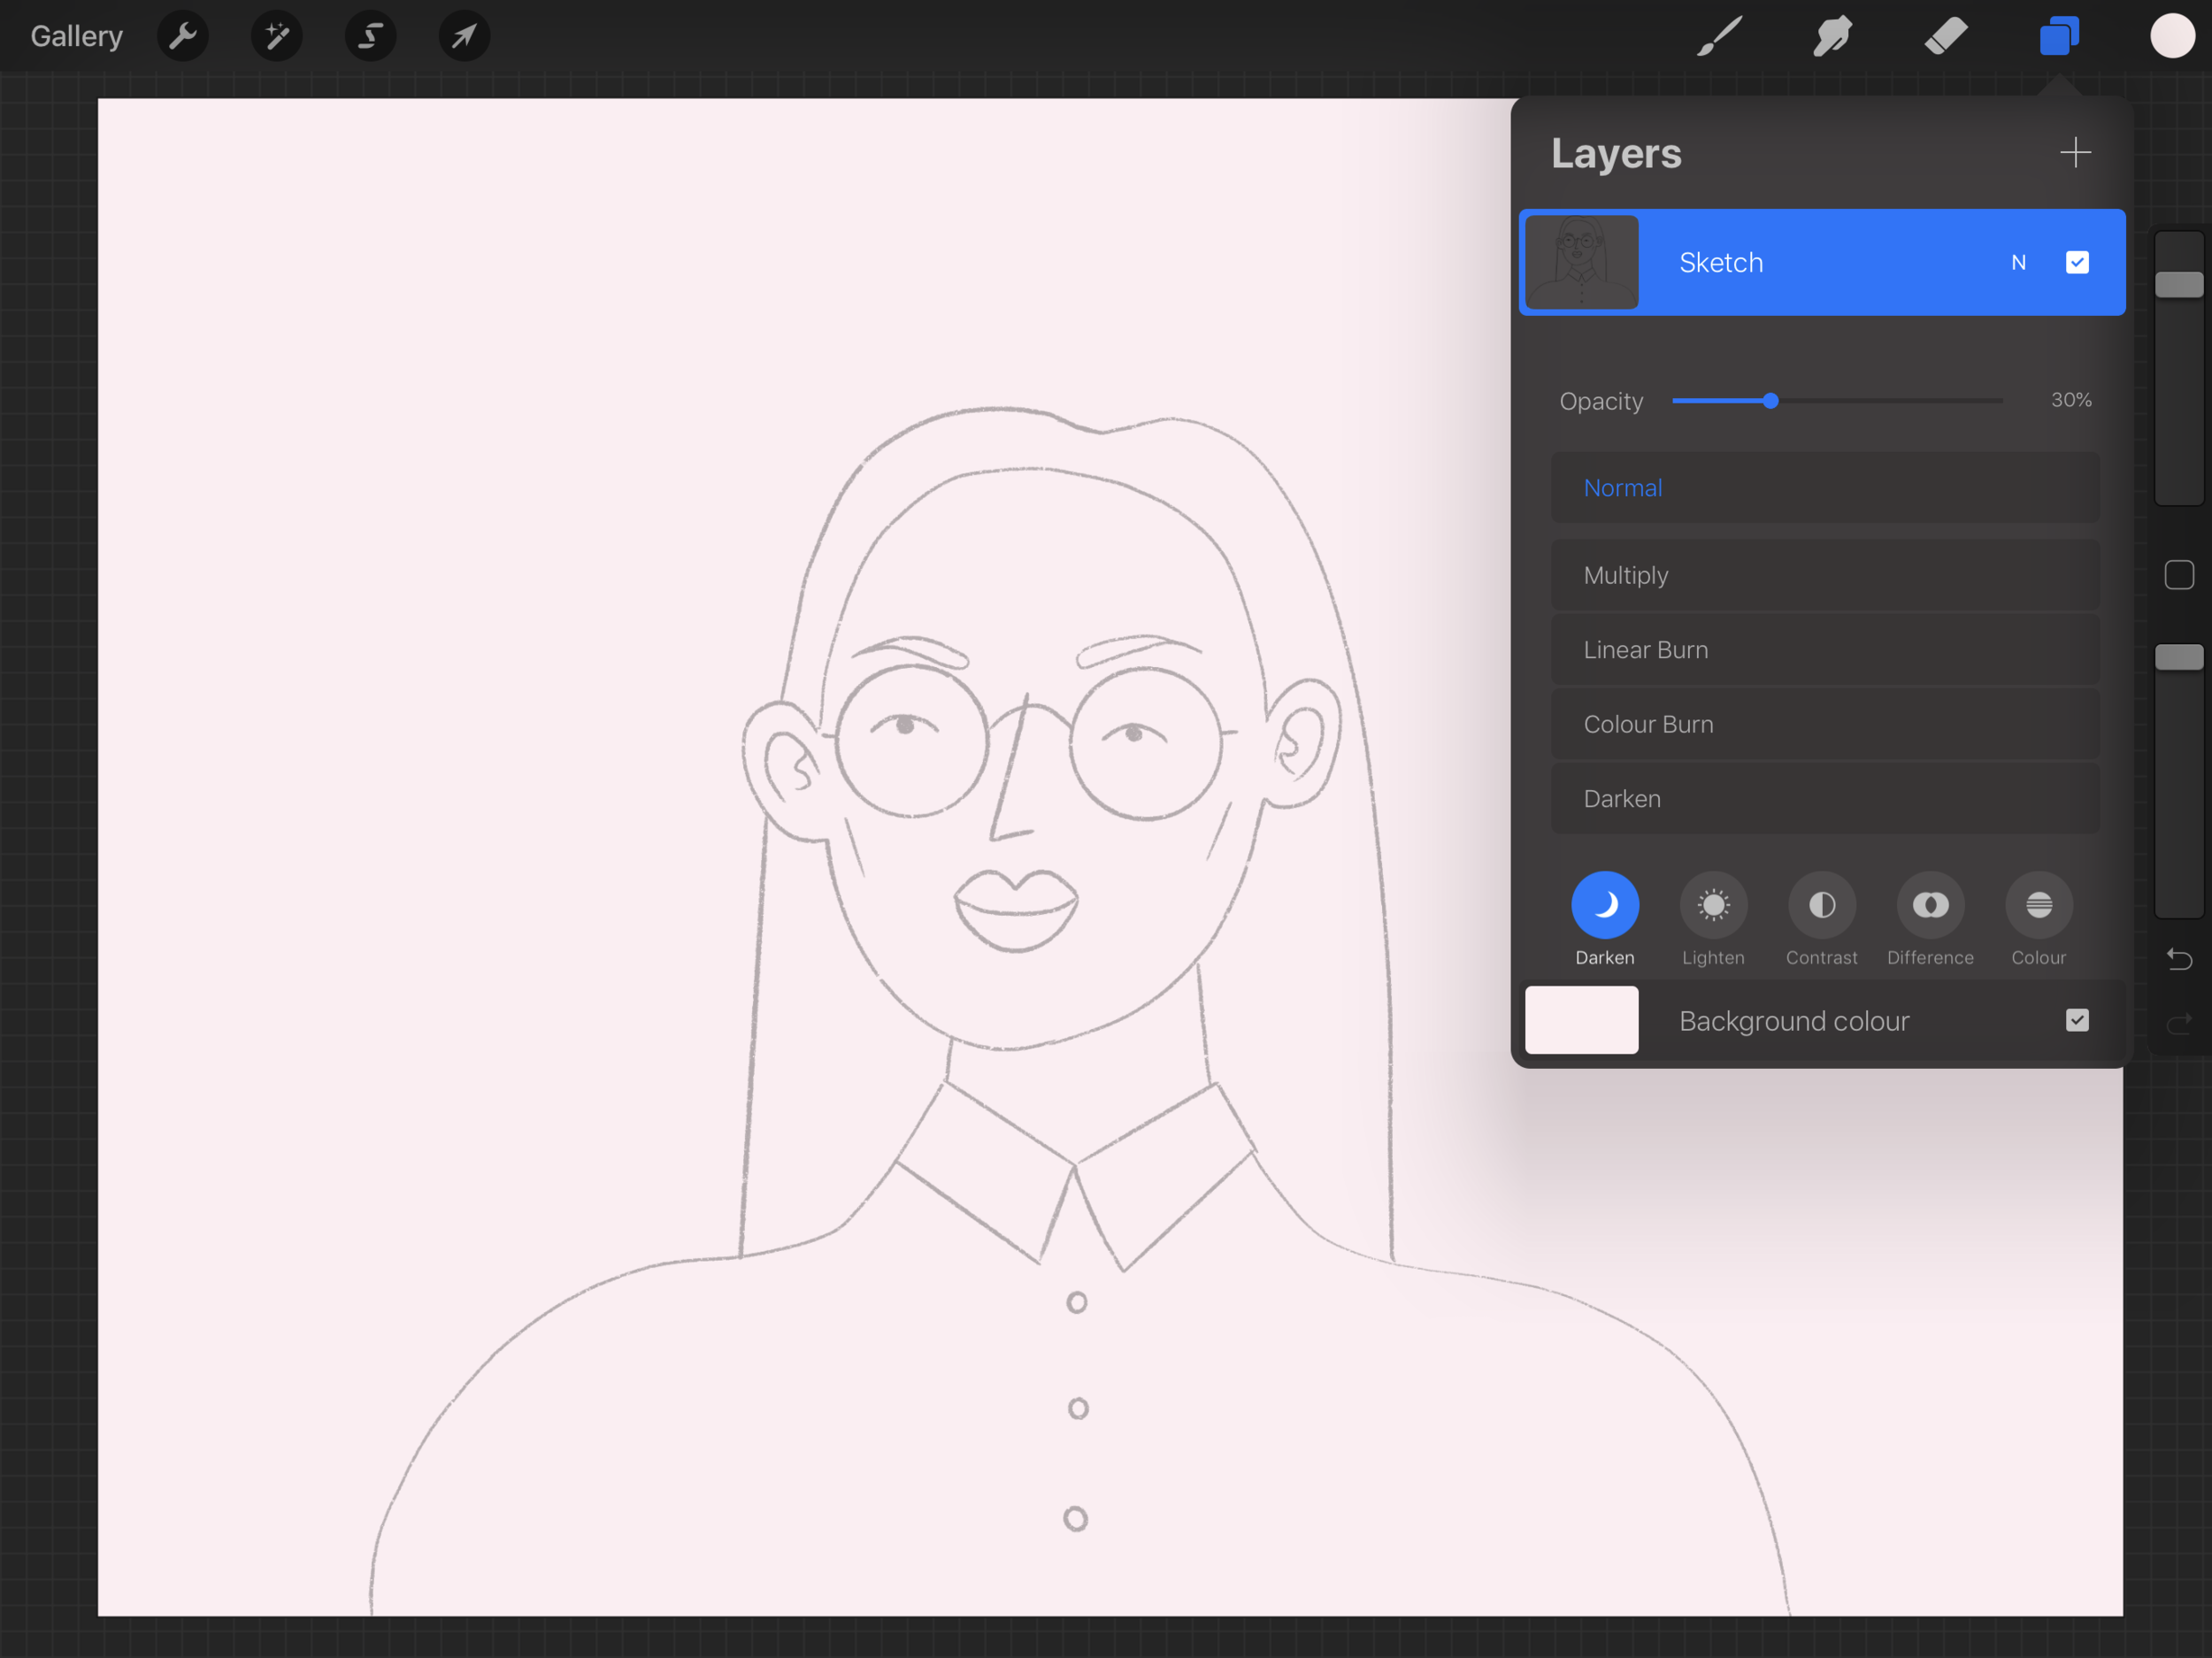
TIP: Procreate allows you set the dimensions and resolution of a new piece. I always select ‘custom canvas’ and set the DPI 300 (otherwise the resolution could be too low for print).

Step 2. Add the Shapes
Following the sketch as a guide, I draw each ‘element’ as a new layer (this is very important!)
Procreate’s recent update introduced the ‘quick shape’ function which allows you to edit lines after you’ve made them (you can see an example of this in the video below where I draw the glasses).
You can fill a shape with colour by dragging the colour from the top right corner.
I use the Monoline tool (in the calligraphy brushes) with the streamline function set to 100% for drawing shapes as this gives a nice smooth finish.

Step 3. Draw the Details
I use the Dry Ink or 6B Pencil brushes to at the details. Again I use the sketch as a guide and add each element as a new layer.
Step 4. Texture!
There are lots of ways to add texture to a piece. Personally I like to keep it pretty simple, I use the spray paint or noise brushes with the opacity set to about 50% so I can build it up.
I add texture to each shape as a new layer, and make this layer a ‘clipping mask’. As the name suggests, a clipping mask 'clips’ a layer to the one below it. Anything you draw on the clipping mask layer will only show up on top of the layer below, which in this case hides anything on the texture layer that is outside the shape.
If the texture layer is darker than the shape layer I might adjust the opacity, and set the layer style to ‘multiply’.
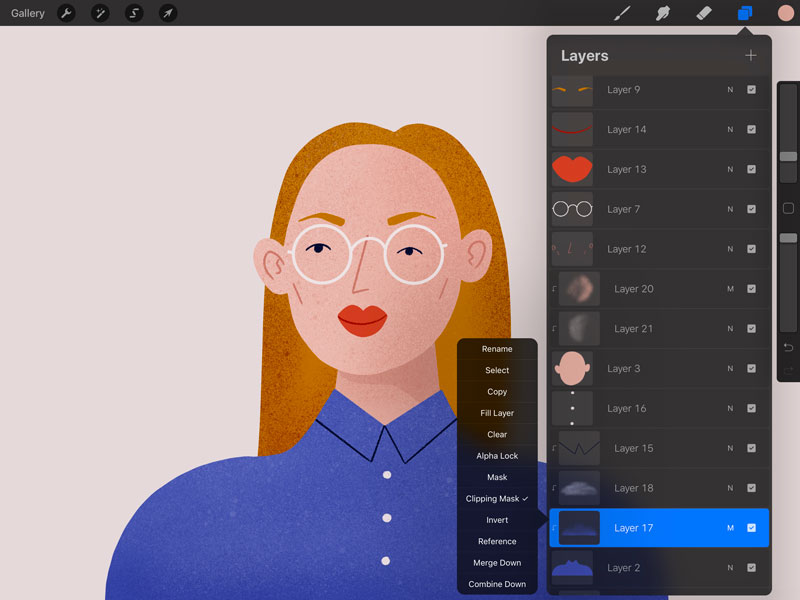
5. Crop and Export!
One great thing about Procreate is that you can export images in a range of formats including JPEG, PSD, PNG (with transparency!) TIFF and PDF. Being able to export as a PSD is great if I want to edit a piece in Photoshop. For this piece I cropped it to a square and exported it as a JPEG.
And there you have it! This portrait was part of a series created using Procreate you can find here.

Huge thanks to everyone who attended the event at Apple! Here are some of my favourite pieces, I’ve also shared some on Instagram stories.


Thanks for reading! Don’t forget to check out my other blog posts where I discuss my process and initial thoughts of using Procreate. Please let me know in the comments if there is anything I haven’t covered!